How To Create A New User
Account In Windows XP
Creating a user account is actually quite simple. Many people today have computers that they share with family members or friends and everyone seems to want something different with the way their computer screen looks.
This can be accomplished by creating more accounts, one for everyone who uses the computer. When you start your computer, and it logs in to your Windows XP operating system, that is your user account.
By creating more accounts for different people to use, everyone can customize their own and do the changes they may want in it.
For example, you can change your screen saver, or you can change your background picture, you can add files to your desktop that only you can access when logged in, and you can even password protect your computer so that only you can access the account.
Now, enough talking and lets get to the part that you have been waiting for.
Go to the "start" menu button at the bottom left corner and click on it. Next, click on "control panel" located on the center of the right pane if you're on standard mode. (Note: if you are on "classic mode" go to "settings" and then you will see the "control panel" link. Click on it) see below.
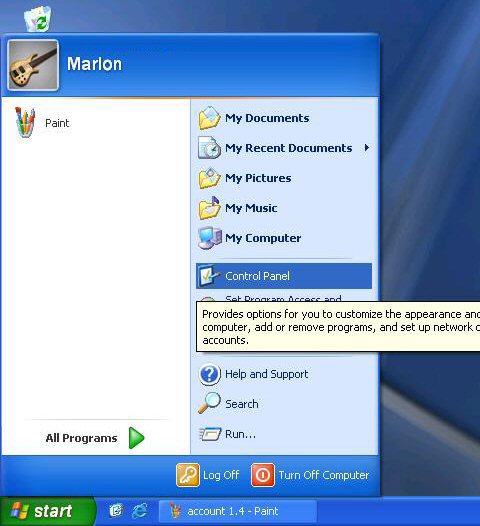
Standard Mode
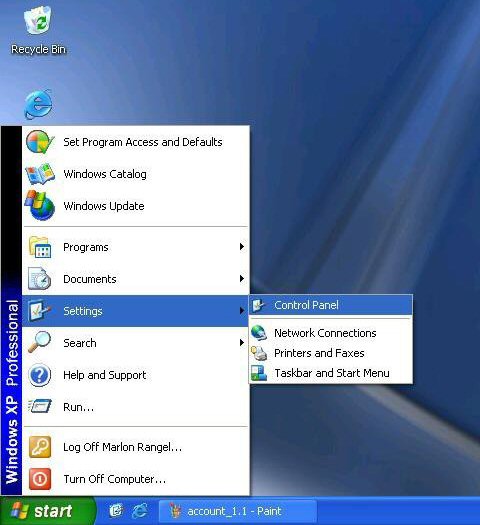
Classic Mode
Once there, find and double click the icon user accounts (scroll down if necessary). A new window will appear with the information you need.
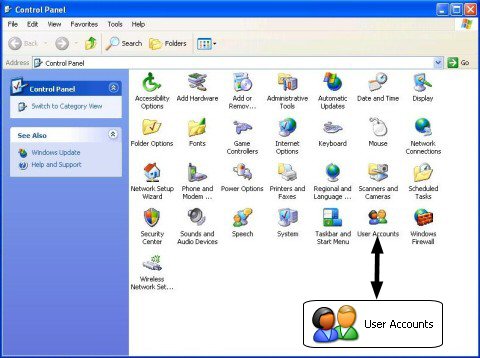
Classic View
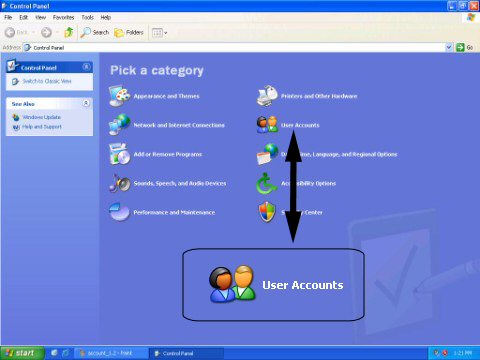
Category View
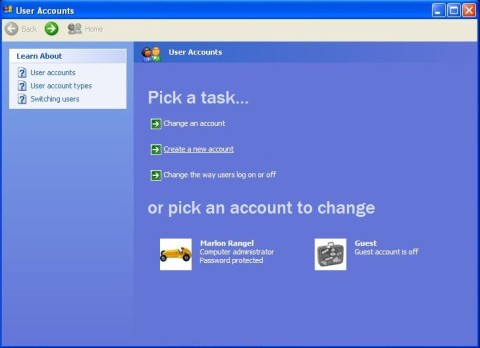
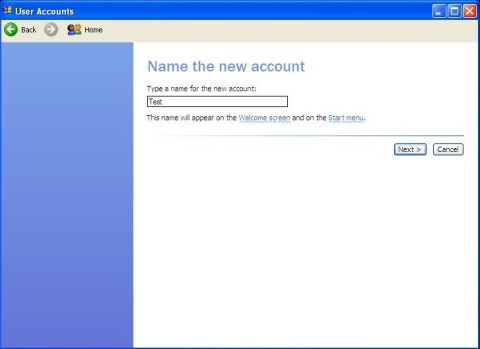
Click on create a new account under the "Pick a task..." title. Now pick a name and type it in. For this exercise I will choose test. Click next.
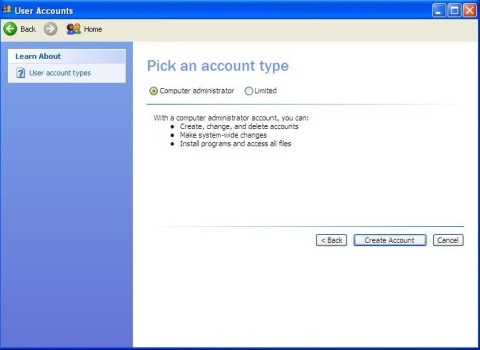
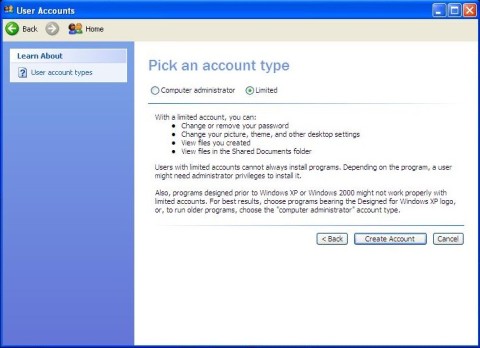
On this window, you need to choose which type of account to get for the user you're creating the account. There are two types (computer administrator, or limited). These two types simply deal with the user rights for the specific account, but you can see more of that on the "what is" section. For now, just choose computer administrator and click create account. See images.
Wait a few seconds and you will have your brand new account created. Next time somebody starts the computer up, he or she can now log into his or her specific account. You can create as many as you want.
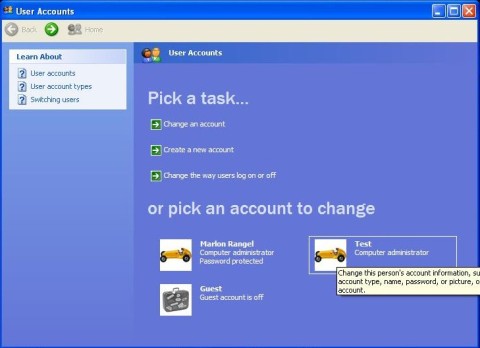
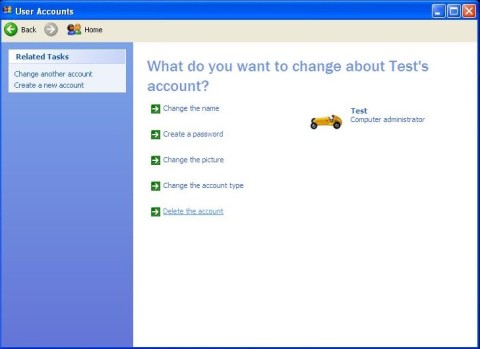
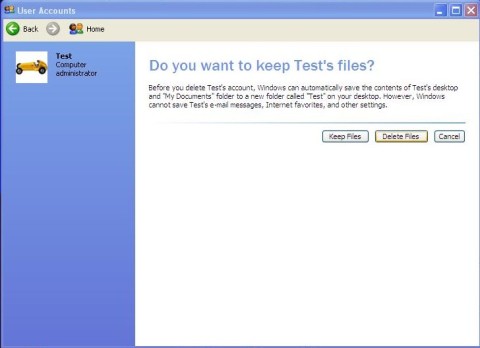
If for any reason you must delete an account, just click on the account (in this case Test account), and then delete account. Then click on delete files and finally the account gets deleted. See images.


Return from user accounts to free computer help